


Azure Portal Directory Level Timeout
Ever left yourself logged into the Azure portal for the entire day and wondered why your session hasn’t expired?
Well that’s probably because you or an admin hasn’t set the ‘Azure Portal Directory Level Timeout’ setting on your tenant.
What is this setting?
It’s a fairly new arrival to the world of Azure and one that hasn’t been publicised to much; hence this blog post!
The setting itself is to help protect yourself and other Azure portal users from leaving themselves logged in to the portal and even more so when they leave their device unlocked.
After a set amount of time, that a Global Administrator can set, the Azure portal will automatically log the user out.
How do I configure this?
This setting is really easy to configure however, you do need to be an Azure AD Global Administrator on the Azure AD Tenant you wish to configure it on.
The steps:
- Sign in to the Azure portal as a Global Administrator.
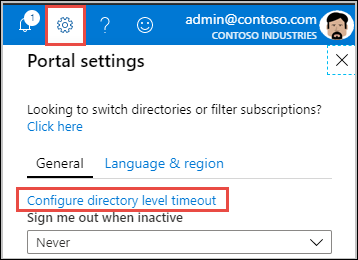
- Click on the settings button/cog in the top right hand corner of the portal
- On the blade that appears on the right hand side, click on Configure directory level inactivity timeout
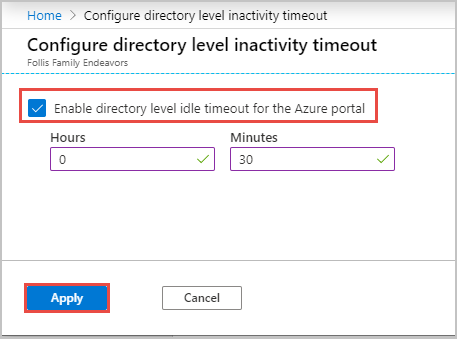
- On the new blade that appears, tick the Enable directory level idle timeout for the Azure portal checkbox to enable the setting.
- Set the timeout duration you wish to configure
- Click Apply
- You should then get a successful notification as you would with any Azure deployment.
Can my users get around this setting once set by a Global Administrator?
Unless they are a Global Administrator themselves, then no.
Non Global Administrator users can set their own timeout duration in the same way as above, but the duration must be less than what the Global Administrator has configured.
If they are a Global Administrator, they can set the timeout duration for all users as you’d probably expect. So make sure only a few trusted people have the Global Administrator Azure AD role.
Summary
Hopefully you have found this post useful and will now go configure this setting across all Azure AD Tenants you manage as in my eyes this is a security best practice!
Further reading on the setting can be found on the associated Azure Docs page